This is a Windows based tutorial so if you run a different operating system please check the Tutorials section for alternative methods. It is really a quick tutorial I’ve just taken lots of images as a few users got stuck; so pay attention and you’ll be fine 
Some information on CloudFlare/APNIC the provider of 1.1.1.1 DNS services
https://1.1.1.1/
Unfortunately, by default, DNS is usually slow and insecure.
Your ISP, and anyone else listening in on the Internet,
 can see every site you visit and every app you use
— even if their content is encrypted.
Creepily, some DNS providers sell data about your Internet activity
 or use it target you with ads.

We think that’s gross. If you do too, now there’s an alternative: 1.1.1.1
This will aid users who have opened up 000webhost hosting accounts and pointed their domain or used a CNAME record to use this own custom yoursite.com domain; your ISP won’t always have the latest information to load your new hosting straight away so this can help you!
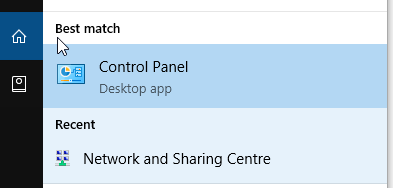
So hit your start menu on Windows 10 and type network and sharing and select the top one or enter Control Panel and find it
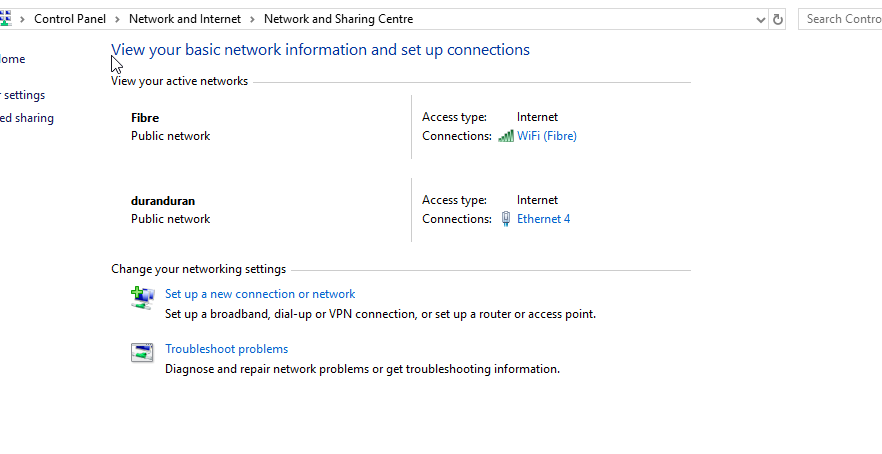
Now this can change for different users; but if you are on WiFi then it will be WiFi (Network Name) you click on network or if you are on a wired ethernet connection it will be Ethernet (Cable) you click
I use both connections on this computer and will update them both but I will for this tutorial choose the wired connection.
Now select properties at the bottom of this
Now select IPV4 then hit properties again

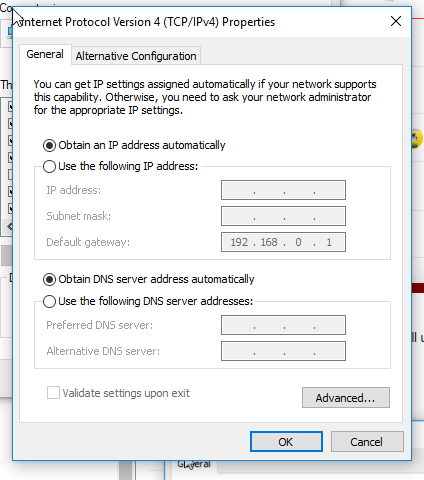
Most likely there is no information here at all but if there is then do not change the top one unless you know what you are doing or if your network administrator has said to change it - most computers will automatically grab an IP address from the network - others may have static configured.
Type in 1.1.1.1 and 1.0.0.1
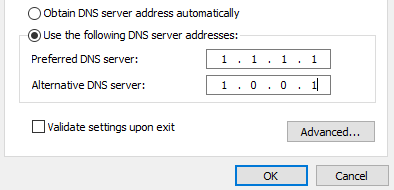
Now save and close all the windows opened.
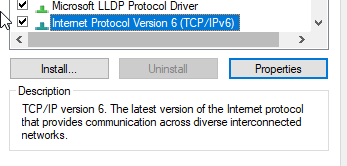
Now select IPV6 and hit properties
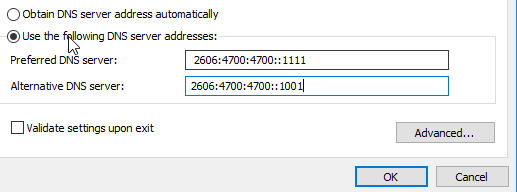
2606:4700:4700::1111 and 2606:4700:4700::1001
So when you type facebook.com into your browser your computer goes to CloudFlare/APNIC DNS to find the correct information to load to bring up the site, before when you typed facebook.com it went onto your Internet Service Provider DNS to lookup where to load up; sometimes ISP DNS can be outdated or slow at updating; CF/APNIC DNS is generally a lot faster at loading websites and having up to date information rather the previous hosting company for example.
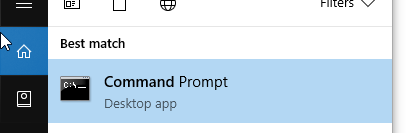
Hit start menu again and search for command prompt
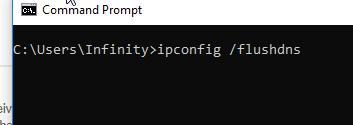
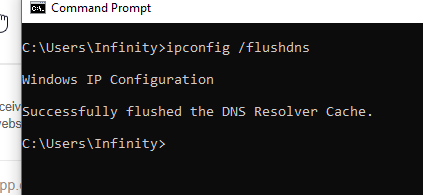
Type exactly ipconfig /flushdns noting the space in the middle
Now hit the return key and it should update successfully
Feel free once this has run to hit the up key on your keyboard and it will paste the same command again, you can hit return again then do it once more - three times.
Now exit by closing the window or typing exit then return.
Now load your website in your browser! It should now load your new hosting account fine!
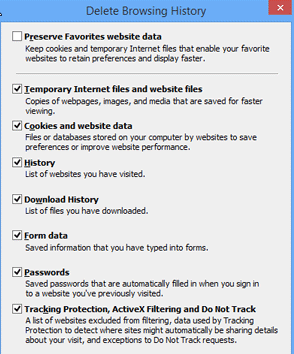
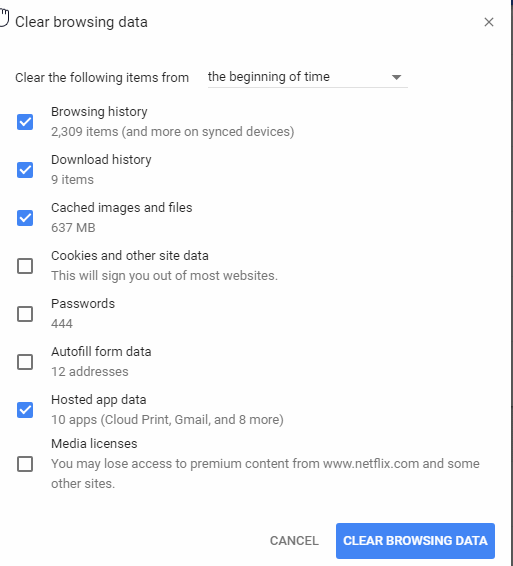
If you are still seeing your old hosting account for example please clear the cookies/data/browsing history on your computer.
Google Chrome: hit settings, search clear data and then run it
Mozilla Firefox: hit settings, privacy, clear data and run it
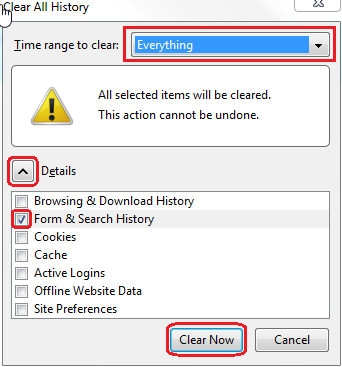
Internet Explorer:
Options, safety, delete browsing history and run it.